
Permanently Deleting a Document with dox2U
dox2U lets you permanently delete documents present either in My Queue or in Trash. Once deleted from these two pages, your document gets permanently deleted from the Workspace.
📓NOTE: You cannot restore a document that has been permanently deleted. In the case where a document is deleted by mistake, you will be required to re-upload that particular doc.
Permanently Deleting Document(s) from My Queue
‘My Queue’ is a list of all the documents that have been uploaded to your dox2U Workspace but have not been verified yet. Since a document is added to your Workspace only after it has been verified, deleting a document from My Queue will delete it permanently.
Step 1: Select the document(s) that you want to delete. Use [ctrl] (Windows / Linux), [cmd] (Mac) or [shift] to select multiple documents.
Step 2: Click on the menu button 
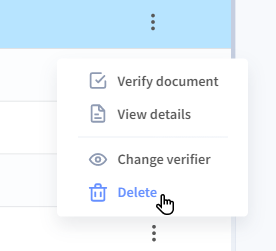
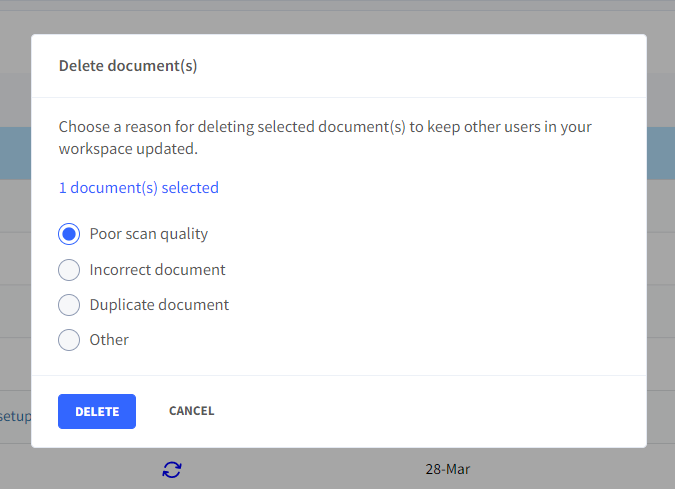
Step 3: Confirm your action and select a reason for deletion in the popup shown.
Permanently deleting document(s) from Trash
To permanently delete document(s), you can simply follow the steps to Empty your dox2U Trash
📓NOTE: Files in your Trash still occupy your space in your Workspace. Therefore, it is always advised to empty your Trash regularly
Let us see how to delete a document(s) from Trash.
Step 1: Select the document(s) that you want to delete. Use [ctrl] (Windows / Linux), [cmd] (Mac) or [shift] to select multiple documents.
Step 2: Click on the menu button (3 dots icon) → delete.
Step 3: Confirm your action and select a reason for deletion in the popup shown.
[SCREENSHOT]